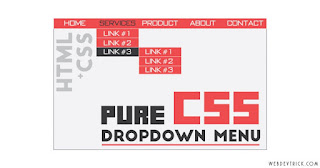
Drop down Menu is very important to make professional blog
or website. However, because of the lack of proper information some blogger don’t use this feature in there blog. Also, many people even think that it is quite difficult to put menu bar with sub menus on their Blog. Well, if you think to put Drop down Menu on your blog easily then you are in right place. In this video i will show you step by step tutorial how to put Drop down Menu with sub-menus in Blogger using HTML and CSS. We will start menu designing by creating a container using a div box. My div box will contain id of navigation. A navigation menu always requires Standard HTML as a basic tool for menu designing. In following script we will use a div tag, <ul> and <li> tags and create menu options.
Following listed script will display simple vertical menu with sub menu, which compile the basic idea of menu designing.
Add this Code in CSS Section
nav {
    display: block;
    text-align: center;
  }
  nav ul {
    margin: 0;
    padding:0;
    list-style: none;
  }
  .nav a {
    display:block;
    background: #111;
    color:#fff;
    text-decoration: none;
    padding: .8em 1.8em;
    text-transform: uppercase;
    font-size: 80%;letter-spacing: 2px;
    text-shadow: 0 -1px 0 #000;
    position: relative;
  }
  .nav{
    vertical-align: top;
    display: inline-block;
    box-shadow: 1px -1px -1px 1px #000, -1px 1px -1px 1px #fff, 0 0 6px 3px #fff;
    border-radius:6px;
  }
  .nav li{position: relative;}
  .nav > li {
    float:left;
    border-bottom: 4px #aaa solid;
    margin-right: 1px;
  }
  .nav > li > a {
    margin-bottom:1px;
    box-shadow:inset 0 2em .33em -.5em #555;
  }
  .nav > li:hover , .nav > li:hover >a{  border-bottom-color:orange;}
  .nav li:hover > a { color:orange; }
  .nav > li:first-child  { border-radius: 4px 0 0 4px;}
  .nav > li:first-child>a{border-radius: 4px 0 0 0;}
  .nav > li:last-child  {
    border-radius: 0 0 4px 0;
    margin-right: 0;
  }
  .nav > li:last-child >a{border-radius: 0 4px 0 0; }
  .nav li li a { margin-top:1px}


    .nav li a:first-child:nth-last-child(2):before {
     content:"";
     position: absolute;
     height:0;
     width: 0;
     border: 5px solid transparent;
     top: 50% ;
     right:5px;
   }


   /* submenu positioning*/
.nav ul {
  position: absolute;
  white-space: nowrap;
  border-bottom: 5px solid  orange;
  z-index: 1;
  left: -99999em;
}
.nav > li:hover > ul {
  left: auto;
  padding-top: 5px  ;
  min-width: 100%;
}
.nav > li li ul {  border-left:1px solid #fff;}


.nav > li li:hover > ul {
 /* margin-left: 1px */
  left: 100%;
  top: -1px;
}
/* arrow hover styling */
.nav > li > a:first-child:nth-last-child(2):before {
  border-top-color: #aaa;
}
.nav > li:hover > a:first-child:nth-last-child(2):before {
  border: 5px solid transparent;
  border-bottom-color: orange;
  margin-top:-5px
}
.nav li li > a:first-child:nth-last-child(2):before {
  border-left-color: #aaa;
  margin-top: -5px
}
.nav li li:hover > a:first-child:nth-last-child(2):before {
  border: 5px solid transparent;
  border-right-color: orange;
  right: 10px;
}
Add This Code in your HTML Menu Section
<nav>
  <ul class="nav">
    <li><a href="#">About</a></li>
    <li><a href="#">Portfolio</a>
      <ul>
        <li><a href="#">item</a></li>
        <li><a href="#">item</a></li>
        <li><a href="#">item</a></li>
        <li><a href="#">item</a></li>
      </ul>
    </li>
    <li><a href="#">Resume</a>
      <ul>
        <li><a href="#">item a lonng submenu</a></li>
        <li><a href="#">item</a>
          <ul>
            <li><a href="#">Ray</a></li>
            <li><a href="#">Veronica</a></li>
            <li><a href="#">Bushy</a></li>
            <li><a href="#">Havoc</a></li>
          </ul>
        </li>
        <li><a href="#">item</a></li>
        <li><a href="#">item</a></li>
      </ul>
    </li>
    <li><a href="#">Download</a></li>
    <li><a href="#">Rants</a>
      <ul>
        <li><a href="#">item</a></li>
        <li><a href="#">item</a></li>
        <li><a href="#">item</a></li>
        <li><a href="#">item</a></li>
      </ul>
    </li>
    <li><a href="#">Contact</a></li>
  </ul>
</nav>


0 comments:
Speak up your mind
Tell us what you're thinking... !